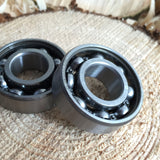
How To Install Ceramic Chainsaw Crankshaft Bearings
Posted by Andrew Wellman at
If damaged on-install, ceramic bearings can lead to catastrophic failure of your saw!
Read this thoroughly and you will be successful.
 Best case scenario: your bearings are noisy. If damaged on-install, the bearings can lead to catastrophic failure of your saw.
Worst case you have the bearings come apart and destroy the top end of your saw.
1.Preparation & Tips
- A clean work space is the key to chainsaw happiness. If your bench top, rags, hands, tools, and parts are not clean your risk getting debris and crap inside your saw. This is not to be taken lightly no matter what you hear.
- Clean your work area, new rags, clean hands, clean tools, clean lubricants. Dirt in your saw acts as an abrasive, and is self machining in a running saw. This can lead to saw failure in as little as 60 seconds.
- With old bearings out and the saw apart, ensure the two crankcase halves are spotless and you have a new case gasket ready.
- Chainsaw bearings are an interference fit in your saw, meaning they are held secure by binding in the case. If your bearing drops into the bearing journal with little to no resistance, you need to get a replacement crankcase half.
- There are two schools of thought regarding bearing installation. The “heat/freeze method” and what the rest of us do. If you are not going to use the “heat/freeze method” you can use these instructions ignoring the heating and freezing instructions
2. Heat and Freeze Method
It is as time consuming as it is handy. Heat expands the parts and freezing them shrinks the parts by a few thousandths of an inch. The expansion/contraction from changing the temperature is very small, but it is just enough to get the job done. Using this method, you play “beat the clock” with your components remaining cold or hot enough for assembly.
You might want to test this method with junk saw parts so you get the timing correct so that the parts do not return to room temp dimension before installation is complete. This would leave you with half installed bound-up parts.
Wear thin gloves to limit your body’s heat from affecting the crank, bearings or case temperature during installation.
Read through these instructions at least once before installing bearings
Tools:
- Heat gun or oven
- Freezer or freezer spray
- 6” long piece of 4x4 lumber with a 3/4” hole in it, blown off clean with an air compressor
- Hammer
- A deep wall socket, or short piece of pipe that the crankshaft slips into and, whose outside diameter closely matches the inside race of the bearing. It is vital that this does not contact the bearing balls or bearing retainer
- Clean grease
- Bearings on crank first
- If right and left bearings are not identical, familiarize yourself with which side of the crank each bearing goes on before installation. Nearly all of the time, the funky bearing goes on the PTO/clutch side. It sucks to put a bearing on the wrong side and have to remove it
- Throw the crank in the freezer for an hour or use a freeze spray to lower the temp of the the crank
- Warm the bearings with an electric heat gun or toaster oven, but not so hot you can’t handle them
- Use the wood block with ¾” hole as a base to hold the crank vertical for installation of bearings
- Have a clean lightweight hammer on hand. You may not need the pipe/socket, or hammer but it’s good as a backup as the parts may return to room temp before completely installed
- Place the frozen crank in the woodblock
- Take the warmed bearing and slide it over the end of the lightly greased crank and down flush with the counter weight of the crank. If there is any binding, place the pipe or socket over the crankshaft and tap only the inner race with the hammer, until the bearing is seated flush with the crank’s counterweight
- Turn the crank over and repeat
Crank Assembly into Crankcase
Tools:
- Appropriate 5mm allen (Husky) or #27 torque bit (Stihl/Dolmar/Makita) tool
- Clean grease
- 7 very clean M5 by 60mm, fully threaded hex cap bolts. These may need to shortened depending on saw.
- PERMATEX MotoSeal
- Crankcase gasket new or good used.
- Acetone
Installation:
- Warm the crankcase up in an oven or with an electric heat gun.
- Freeze the crank assembly in the freezer for an hour or use freeze spray. If you use the freeze spray to cool the crank assembly, do it gradually with multiple sprays, so the bearings are not shocked
- Remove any old gasket material or sealant from your case halves
- Clean the case gasket surfaces and gasket with acetone
- Put a thin layer of Permatex MotoSeal on both sides off the crank case gasket. Place the gasket onto one crankcase half so it’s held in place. Some Saws have alignment points in the case halves that help hold the gasket in place during assembly
- Lightly grease the the bearings OD (outside diameter) and the case ID (inside Diameter).
- Push the frozen crank assembly into the heated case half that you have the gasket on. It’s important you have the crank assembly square with the case so it does not bind. Make sure the crank rod is facing up towards the cylinder. If there is a bind, and the crank is square to the case, leave it and quickly move onto putting the other case half onto the crank assembly.
- Slide the remaining case half over the shaft and align the two case halves for proper mating.
- Tuck in the oiler pick up so it does not get caught between the two case halves.
- Make sure the crank rod is facing toward the cylinder. I have assembled a case and had the oiler pick up line sticking out of the case and had to start again.
- If you are lucky enough to have the crank and case slide mostly together, then with very clean case bolts pull the case together evenly and gradually. The case bolts must be very clean, if they are not they will shed debris as they get threaded in, leaving the debris in your gasket sealer and possibly in your crankcase, BAD!
- Slowly pull the case together with the case bolts with the case halves remaining parallel to each other. If you are unlucky and the case halves are not together, use the longer m5x60mm bolts to draw the cases together making sure the case halves are parallel.
- If the long bolt are too long to pull the case together then shorten them on a grinder until they work for you. Each saw is different. It’s important to know that the long bolts will not pull the halves completely together because they will bottom out. When this happens remove them and put the original case bolts in and pull the case together.
- Snug the case bolts down as if you were tightening a spark plug, do not go nuts.
Setting The Crank:
The crank bearing may feel stiff because there side load from the assembly of the crank and crank case. Your crank should move freely and a little less so if you have your crank seals in. If the crank bearing does not move freely then you need to set the crank.
The crank should be centered in the case and move freely. You can put a feeler gauge between the case and the counter weight and each side to measure. Each side to be roughly the same, within .010”. There is enough right to left rod play that it adapts to how the crank is set. Move/set the crank with a light hammer and piece of soft metal, alloy, brass etc. Place the soft metal on the end of the crank and moderately tap the crank with the hammer, each time testing the free play and the crank spacing. Do this on both sides until the crank is centered and the crank moves smoothly.
You’re done...
with the high-stress bearing install
...on to saw reassembly!
Share this post with other cutters
0 comments